|
DIY Apodizing mask
|
Do-it-yourself Apodizing Mask
Introduction
I've run into this gadget incidently somewhere on the internet. This is a mask that you have to fasten to the front end of your OTA (Optical Tube Assembly) and is primarily used by planet and binary observers. I've come across many different opiniont about this mask: some say it's brilliant, some say it does not perform any better than your regular colour or neutral filter. I've even forgot about it until recently the Jupiter was just in such a great position on the sky that I had the idea that I should not be manipulated by anyone's opinion and give it a try and see what this mask adds to the observation. So this article will show you how to create your own apodizig filter and I'll also describe and illustrate my own experience with the mask I've built.
The apodizing mask (often referred as apodizing filter) is something that was invented to enhance contrast, but paradoxically it achieves this goal while it also corrupts the details of the image. This is done by a special diaphragm to block some parts of the aperture, or so to say we theoretically corrupt the image of the scope while we also enhance the image. I know this sounds weird, so I have to emphasize that it's only the outer parts of the image that become pretty much useless, while the central part (in about a diameter of two Jupiters) becomes a lot better. As it is the diffraction that ruins the contrast the most, it is clear that this mask enhances the view of optical systems where there's something that blocks part of the aperture - such as Newtonian reflectors, catadioptric systems, etc. - and is less useful for scopes without a central blocking, like refractors, Yolo telescopes, etc.
Some optical basics
To understand how this mask works, we must get a little bit into some optical concepts like the Fresnel diffraction, Airy-disk, resolving power, diffraction rings and so on. I know these might sound exotic to some of you, but don't worry, I'll try to explain the bare basics as much as I can, but bear in mind that I'm not that much experienced in optics so I cannot guarantee that I'll be always prefectly right, but anyway it's not necessary to get into the depths of optics to understand why the concept of apodization might work. Anyway, feel free to correct me if you find something that's wrong.
First of all, it's good to know that the resolution of our telescope - or with other words the level of details we can glimpse with it - is primarily affected by its aperture plus all the things that block the way of the light till it ends up on our retina. One of these things is actually the open end of the OTA, or the ring at the open end of the telescope as this is itself a baffle, or something that blocks our field of view. The diameter (aperture) of the telescope changes resolution in a positive direction: the bigger the scope the better the resolution. The next figure shows you how the intensity of a beam of light changes in the focused image:
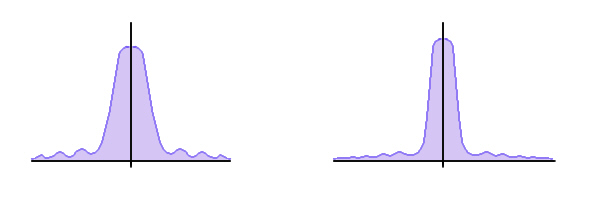
The hill in the middle of the intensity diagram draws the actual star (or a dot-like detail on the surface of a planet). This, as you can see, is not a point-like feature, but it's actually a little disk, therefore the image of the star will never be a pinpoint but instead it will always be shown as a really really small disk that gradually but quickly fade near its edge - this is the so called Airy-disk. With a larger aperture this central hill is narrower (the Airy-disk is smaller) compared to a small aperture telescope, as the perimeter of the larger OTA's end ring (that causes a diffraction - something when the light is detoured from its ideal path) is growing in a smaller rate compared to its surface area. So while with a small telescope the perimeter of the OTA's diffracting end ring is relatively large compared to its surface, this rate gradually decreases when moving forward larger diameters. This can be verified easily if you calculate the perimeter and area of various optics.
Now we see that larger aperture means narrower central hill, smaller Airy-disk, and if you relate the construction of a planet's image to a computer monitor's image constructed of pixels, you can easily understand that the smallest detail of a telescope's image will also get smaller with a smaller Airy-disk, just like a monitor is capable of displaying a higher resolution if its pixel size is smaller. As by a small OTA the Airy-disks are relatively large, they are blurred on a larger area, making the image of the scope softer, less contrasting, showing less details. However, if you have larger optics, the Airy-disks are smaller, they blur in a smaller area, resulting in an image that features more details, or so to say an image with higher resolution.
Let's take a look again on the above figure. You may notice, that not only is a central hill is resulted from diffraction, but there are also many smaller waves that are higher near the center of the light cone and gradually losing their amplitudes toward the edge until they are quiesced out. In the concept of diffraction we speak of n-th order images, which means that the central, original image is the image of the object itself is called the 0th order diffraction image, while on its sides you will see the 1st, 2nd, 3rd, etc. order images of the object, gradually fade away. These are diffracted images, that are in case of white natural light actually decomposed into its components, just like the colours of the rainbow. These are in fact spectral images of the source of light, that are getting gradually fainter. These diffraction images can be easily created using prisms, diffraction gratings, cd/dvd disks. I will not get into details about this now, but you can find many DIY CD-spectrograph websites around the web.
Back to the waveform: these weavelets with their decreasing amplitudes are the reason for the so called diffraction rings, the phenomenon of the gradually fading concentric circles of light around focused stars. Using smaller optics these waves are wider, therefore the diffraction rings are more pronounced, while larger optics this quiescing of waves is happening at a much faster rate, so these optics sometime barely display any diffraction ring around star images. Although the details of an image is mostly specified by the size of the Airy-disk, merging diffraction rings are also strongly corrupting contrast.
It's worth to mention that of course not only is the edge of the OTA that creates diffraction, but virtually anything else that's inside the path of the light: the secondary mirror is the most guilty with its relatively large perimeter. Another strong source of diffraction are the spider vanes - in another article about the building of a hexagonal mask I'll get into details about the different diffraction image of these vanes -, but also contributes to diffraction the focuser that extends into the inside of the OTA, or even the observer who grabs the edge of the OTA of a (mostly Dobsonian) telescope to make it move, and forgets his hand there.
Allright, now we know the basic reasons why the contrast of the image of the telescope is necessarily corrupted, now all we need to do is to solve this problem. We need something, that cancels out these small wavelets around the Airy-disks. Something, that darkens the image exactly where these smaller waves are. Something that minimizes the diffraction caused by the open edge of the OTA.
This is what the apodizing mask is made for!
How does it work?
The principle of this mask is to have something in the light path that is gradually darker towards its outer edge, and it's the most effective if its transmission changes at the same rate the amplitude of the wavelets change around the big hill of the Airy-disk. As the brightness of the diffraction rings is gradually decreasing, we only need to cancel out the most luminous ones - that means that for general visual use with smaller optics we may need to cancel only the first order ones, while with increasing aperture we need to cancel two or three. To cancel the waves we must put increasingly lower transmission (=darker) disks in the light path, that allow light to pass through in diameters 55%, 78% and 90% of the diameter of the OTA. For smaller telescopes you may need to add only a single mask 55% of the OTA's diameter. For large telescopes I recommend using all three layers. The lucky owners of giant telescopes may also need to add additional layers to cancel the 4th, 5th, 6th order diffraction rings. According to my experiences, at 12" aperture size the three layer solution is enough. The percentages mentioned just earlier - the distance of wavelets from the middle of the Airy-disk - can be calculated exactly, but this is something I'll not try to explain here - for those interested, you should search for the term "Fresnel diffraction", there are many great websites on the internet about this with formulae, calculations, explanations.
Again, the task is to build a mask, gradually darker to its outer edge that cancels out the diffraction rings, thus increasing the contrast. You may ask, that if the mask is so dark near its outer edge, how will that affect the actual aperture of the telescope? As the aperture virtually decreases, the resolution of the telescope must also do so, isn't it? And you're perfectly right, the resolution in fact will get worse as the Airy-disk is getting wider and wider. On the other hand, as the mask is transparent, the size of the Airy-disk is growing only very slightly, while the diffraction rings are wiped out with a much better efficiency. The result is a less detailed image, but with much better contrast - and details are useless, if the contrast is too low. This means, that we will still see more details in the image despite the fact that we should see less according to the growing Airy-disks.
I know this sounds like a paradox situation, but I'll prove it works at the end of this article! :D
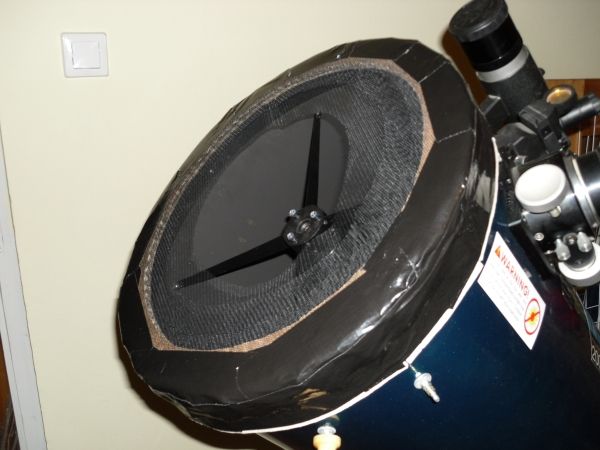
Creating the mask
You'll need the following tools and components to build this mask:
- a sheet of thin foam rubber (eg. the one used for radiator heat mirrors or to put under your sleeping bag while you're camping). It should be about 4-6cm (2-3in) wide and at least as long as the perimeter of the outer edge of the OTA.
- a piece of strong thick cardboard slightly larger than the diameter of the OTA.
- duct-tape (preferably black)
- black window screen, large enough to cover the open end of the OTA three times, plus an additional 1-2cm (0.5-1in) in diameter.
- tools: modeling knife, scissors, pen or pencil, calipers, calculator, ruler
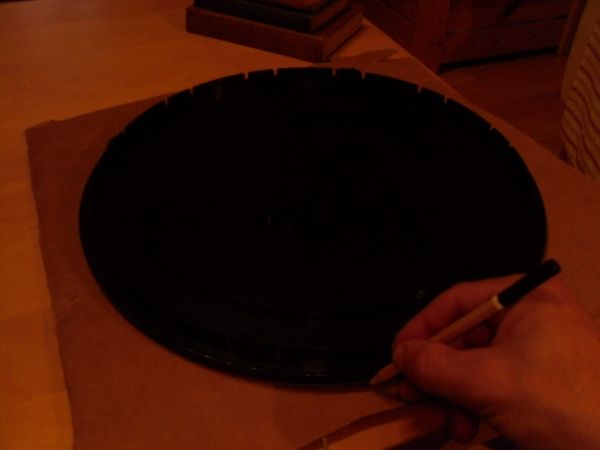
Step 1
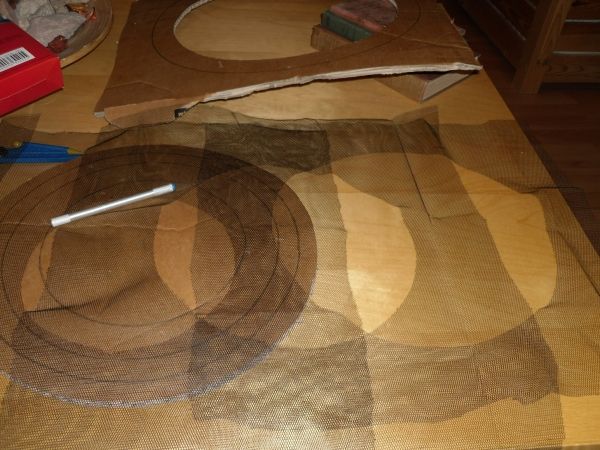
Using the thick, strong cardboard (I was using the original paper box my telescope came in), create a disk with the exact diameter of your OTA. You can use either a caliper or as a cheap trick I was using the end cap of my telescope as a template, although if you choose this method, you will need to specify the center of the disk later. I was using the latter technique, then with a caliper opened to the radius of the cap I could specify the center point by drawing intersecting arcs.
Step 2
As the next step, we must draw the inner diameter of the mask on our cardboard disk. This shoud be as large as the actual size of our telescope mirror (or lens diameter). It should not be any smaller, as that would decrease the effective diameter of the telescope. It can be a little bit larger than the mirror's diameter, but it is not necessary. To calculate the best matching diameter, you may use the Newt for the Web tool to model the light path of your OTA.
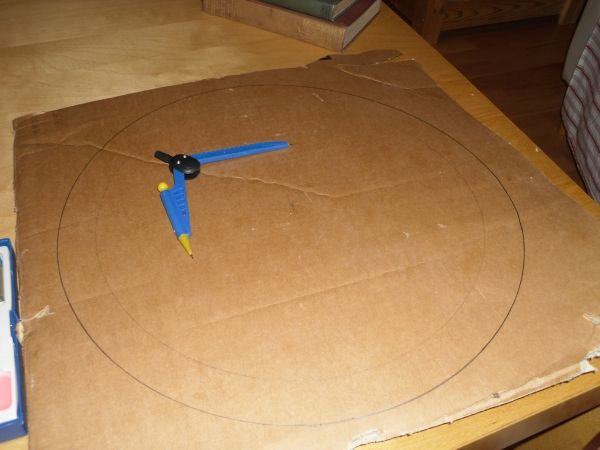
Step 3
It would be useful to measure the 55-78-90% circles on the disk now, as this may make a fine template lated for cutting the right size of window shield, and appropriate positioning of the shield layers.
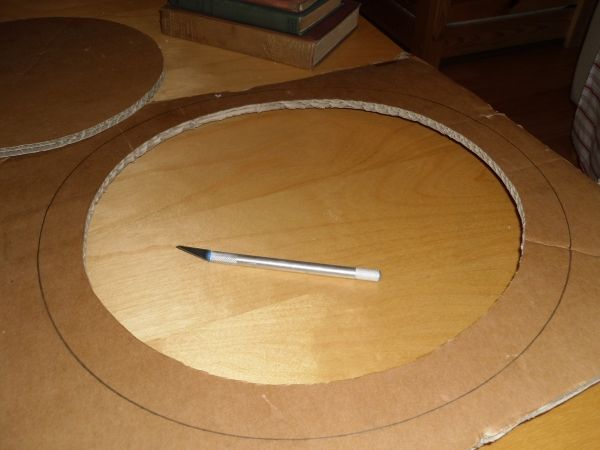
Step 4
Cut out the inside circle of the disk. For this, you should use a very sharp modeling knife, or any other tool that's sharp enough. It's important, that the arc must be cut as perfectly as possible: everything that differs from the perfect circle will cause diffraction spikes! The nicest, faintest diffraction is caused by the shape of a circle! I will explain more about diffraction phenomena later in the article about the DIY hexagonal mask.
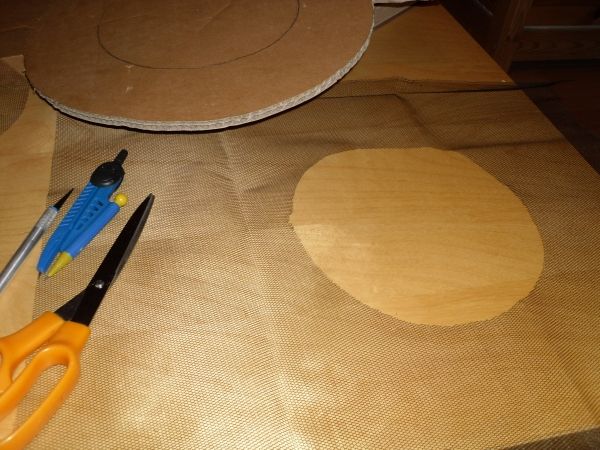
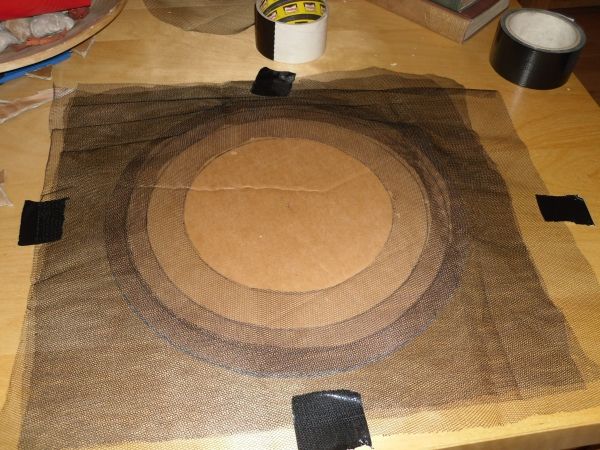
Step 5
Cut out three layers of square shaped window shield. You don't need to make it perfect, and their size should be about 2-3cm (1in) larger than the empty part of the mask that you just removed in the last step, so they will be easier to affix to the mask.
Step 6
Using the template we've created in step 3, cut out the circular insides of the window shield layers. So one of the holes should be as large as 55% of the aperture size, the second layer 78%, the third layer 90%. For smaller telesopes, you may ignore the last two, but it's also okay if you decide to still use all three layers. It's easier to cut the holes if you put the window shield on the template, secure it with some weight, and cut using your sharp modeling knife. Aim to have a perfect circle, for the sake of a nice diffraction image.
Step 7
After you're finished with all three layers, cut them around so that their outer edges will be nearly circular, and larger than the template, so you will be able to stick them to the ring of cardboard.
Step 8
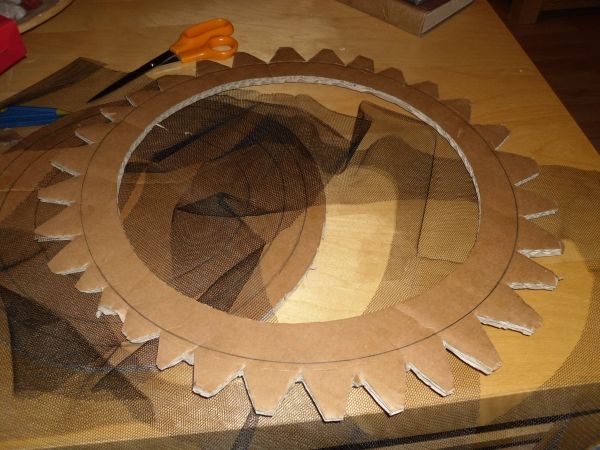
Cut around the cardboard mask so the you leave about another 3-4cm (1-2in) around the outer edge (the one that's the same diameter like your end cap). This is needed to create tabs for securing the mask to the mask mantle.
Step 9
Cut the tabs: perhaps the easiest is to cut small triangles, and you don't need to make a perfect job here. Where we want to fold them down, it's good to make a cut with the modeling knife through one layer of the cardboard. Otherwise it will be to thick and hard to fold.
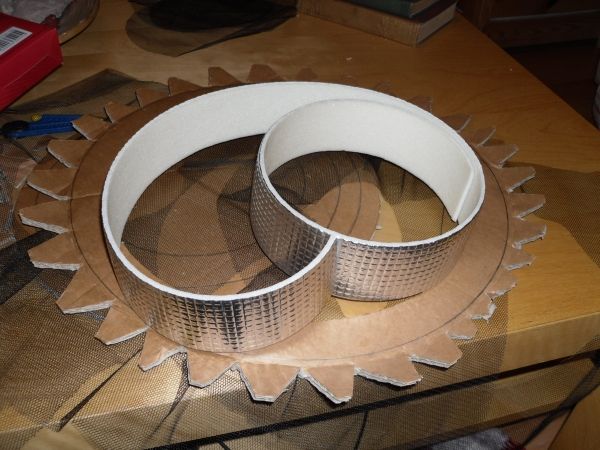
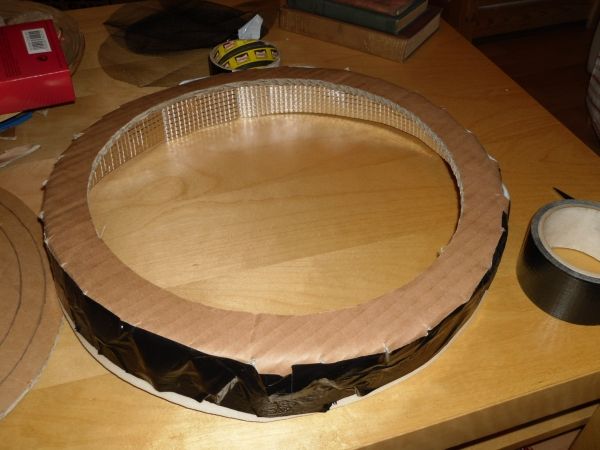
Step 10
Create the mantle of the mask. The best for this is some sort of thin sheet of plastic foam, I was using a heat mirror usually used between the heating radiators and building walls. I like these, because they are very thin and flexible, yet because of the additional mirroring layer they are quite strong. Because of their flexibility I prefer these against solid mantles, as they fasten quite strongly to the OTA. So, cut a stripe about 4-6cm (2-3 in) wide, and as long as the outside perimeter of the OTA. Try to make it just as long as it is secured thightly around the tube, yet can be easily removed if no longer needed. We don't need to be foolproof here, as this is not a mask used for solar observing. I think it's better to make it not that thight as I find it good to be able to switch quickly and easily between normal and masked operations. When we've found the right length, stick the two ends of the stripe together with the duct-tape, to get a ring.
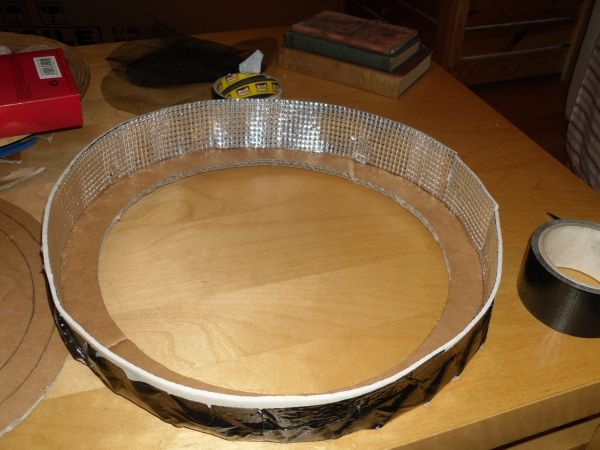
Step 11
Fold the cardboard tabs on the foam mantle continuously using duct-tape to secure it as you progress. You may also use other types of (liquid) glues, but I think the duct-tape is fine because you don't have to wait until it is set.
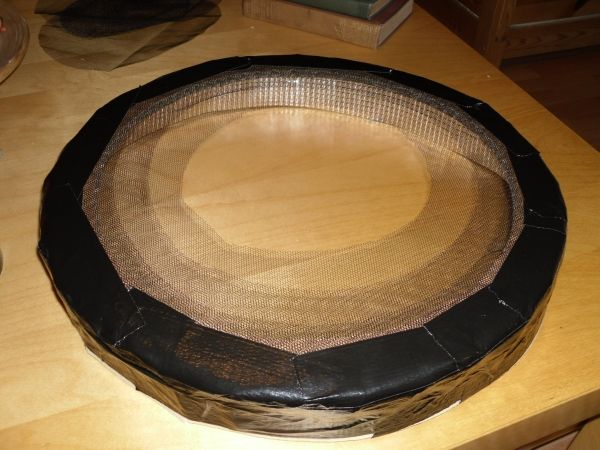
Step 12
Here comes the difficult part: adding the layers thightly to the mask. To make it well-centered, you may use your template again. Do not put extra strain on the window shield layers, as you may easily deform them, and now it's essential to have the holes as circular as possible. Once all three layers are set, affix them with duct-tape. Important, that the diffraction image is determined by the pattern of the window shields. I was using hexagonal pattern shields, so it was not necessary to pay extra attention to the angle of the layers. In case you are using square pattern shields, for the nicest diffraction image I recomment to rotate them in 30 degree angles compared to eachother. Later, when analysing the image using the apodizing mask, I will explain the influence of the shield pattern to the diffraction image. It is important to be very patient now, reapply the layers again and again if needed until we reach a nice concentric, circular, well-patterned mask. When finished, secure the layers strongly to eachother with pieces of duct-tape.
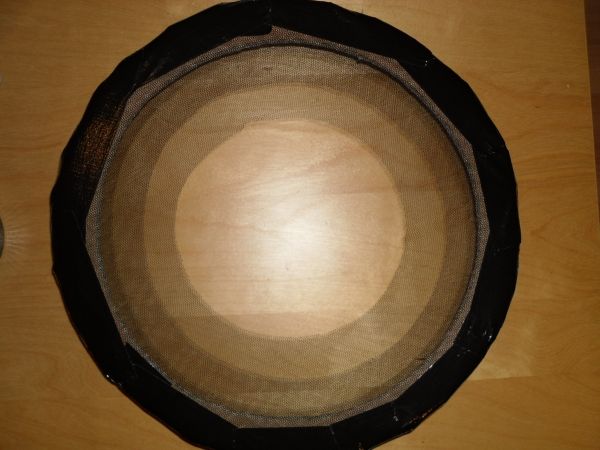
Step 13
To be sure, use as much duct-tape as you can, so that the layers of the mask will not move relative to eachother.
We're done!
Now we're finished with our apodizing mask, you should try and see if it can be easily put on and off your telescope.
Be sure not to use or store the mask in extremely humid conditions for longer periods as this may be bad to the cardboard base, of course this is not an issue in case you use a sheet of plastic instead of cardboard. Another idea for making the mask better is to paint the inside of the mask with flat black paint (but NOT the window shield layers!).
My experiences
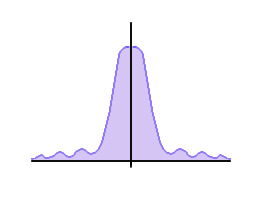
In the last few days I was able to test the mask, and to tell you frankly, I was very much impressed with what I've seen, although the view through the telescope was shocking at first:
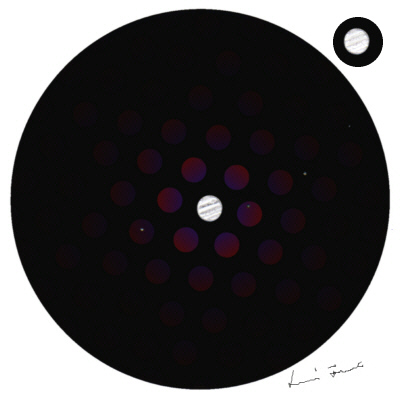
As a matter of fact, only about the internal 2' part of the field of view is useful, so this mask is only good for small diameter objects: thight binaries, binaries with large brightness differences, planets, smaller planetary nebulae, tiny globular clusters. It's useless with larger objects like the moon, most of the deep-sky objects and so on.
A little explanation for what we can see in the above sketch: in the middle, you can see the mighty Jupiter. By switching between the masked and normal view the contrast obviously increases - see the comparison sketch in the upper right corner. Around the Jupiter you can see the Jupiter-sized n-th order diffraction images of the planet, with the same size as their originator. These are colourful, with all the colours of the rainbow from violet to red, directed from the center towards the edge of the field. Of course, the farther from the 0th order (real) image, the fainter the diffraction image.
This characteristic diffraction image is a result of the window shield's pattern. The hexagonal sewing of the shield creates this order of the diffraction images, but the 30 degree rotated square patterned layers would cause the same look.
Near the edge of the field of view the diffraction images are merged - this is caused by the increasing number of layers towards the edge of the mask. If I would be careful enough to apply the layers perfectly, so that every little hexagon in the window shield layers cover the next layer perfectly aligned, then this merging would not be so obvious. On the other hand, then the number of layers would not make any sense either, as the mask wouldn't get gradually darker. To put it straight, as you may already found out, it's not the transmission that counts, but it's in fact the level of diffraction that makes the mask work. The gradual darkening is just a concomitant.
While I was observing, I've noticed that when I was using the mask, the rim of the planet did not dance so much compared to the maskless observation, so it seems that the apodizing mask is also good to make the telescope less sensitive to seeing problems. This is a result of the virtually decreased aperture.
Of course, similar effects can be achieved with neutral or colour filters too, but the image with this mask was somehow different. I think that the non plus ultra of planetary observations would be the combined use of the apodizing mask and various colour filters.
The sketch was done at a magnification of only 167x because the seeing was really bad at the time (2 out of 10 on the Pickering-scale), I wonder how a much better seeing affects the differences between the masked/unmasked images, especially with higher powers. Of course it is very subjective, what level of change one might consider as dramatic, I think that especially for beginners, the differences may not be so obvious and the diffraction images may even be disturbing for them. For advanced observers however, who know what it takes to struggle to get a quick glimpse of a never before seen detail, I think this mask will not be a disappointment.
Epilogue
I hope many of you, fellow amateur astronomers will decide to give a try to this mask, despite that in some articles or forum posts some observers are against the practical use of the apodizing filter. Actually it is also manufactured by professional optical companies for big bucks, so I guess that theoretically and practically the mask must work, and it's only the lack of experience that speaks when someone is not satisfied. Anyhow, I'd be happy to hear about any experience with these masks, even if they are negative opinion, as that may be useful too.
Links, useful information
Newt for Windows/Web: http://www.dalekeller.net/ATM/newtonians/newtsoft/newtsoft.htm
About diffraction caused by circular apertures: http://hyperphysics.phy-astr.gsu.edu/hbase/phyopt/cirapp.html#c1
Maskulator, a diffraction image simulator: http://www.njnoordhoek.com/?p=376
Another apodizing mask article: http://www.astronomyhints.com/apodize.html
All text and pictures are copyright of Ferenc Lovró. If you'd like to use/translate/copy/alter/print them please ask for a written permission. Thank you!
|
|
|